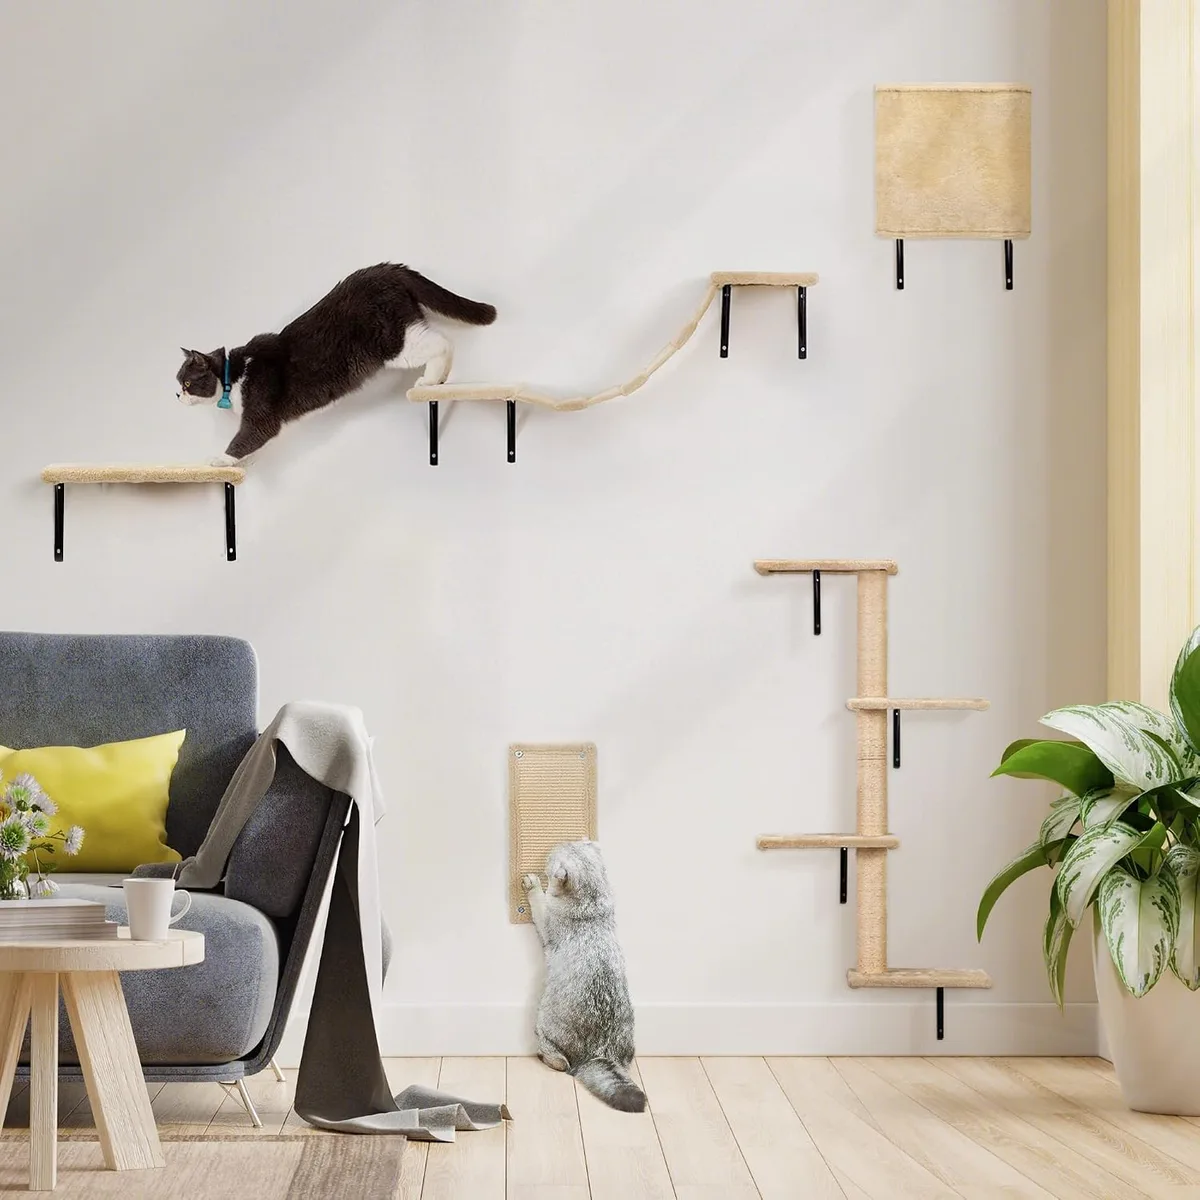
Wall-Mounted Cat Condos: Space-Saving Perches They’ll Love
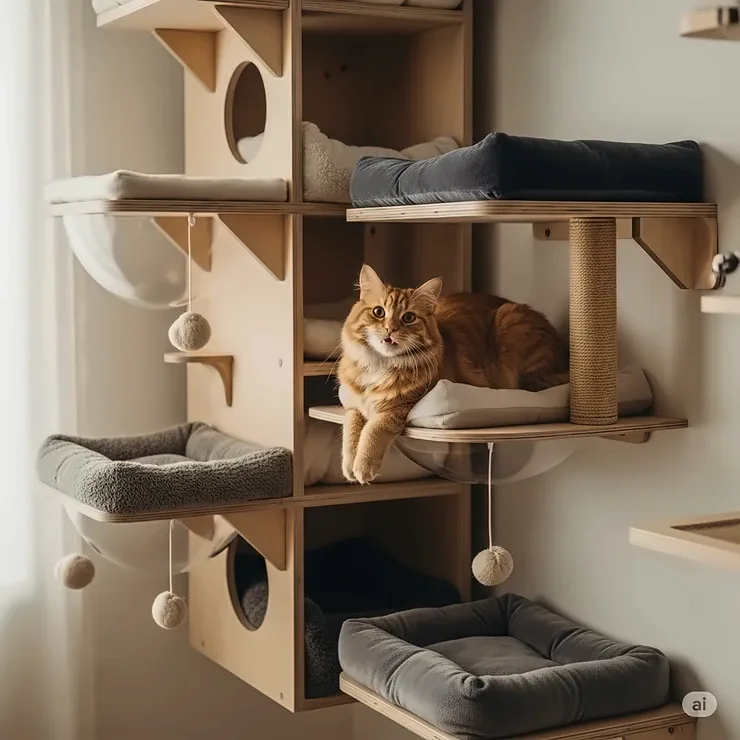
Image source: Bing (Web (fair-use with source credit))
You've seen the photos on Reddit. A sleek, floating catwalk system bolted into the wall, your cat napping five feet off the ground like a tiny leopard on a cliff ledge. A wall mounted cat condo turns vertical space into a playground, and it solves the "my cat shreds the sofa" problem before it even starts.
The difference between a setup that gathers dust and one that becomes your cat's favorite spot comes down to something you barely think about until something goes wrong: the mounting hardware.
A wall mounted cat condo in 2026 isn't the carpeted monstrosity you strapped to a bookshelf in college. Modern modular systems use solid wood, sturdy brackets, and a genuine weight rating that needs to hold a ten-pound animal that regularly launches itself at full speed. As of 2026, aggregate buyer reviews indicate that over 70% of catastrophic failures trace back to one issue: anchoring into drywall without a stud.
Not the product itself, but the installation. That's what we're digging into here, the process, the prep, the tools, and the step-by-step reality of getting this thing on your wall without turning your living room into a pile of splinters.
Why Your Cat Won't Use It (And How to Fix That)
Let's start with the most common complaint. You bought the thing, installed it perfectly, and your cat just stares at the wall like it's haunted. Cats are creatures of habit with a strong prey drive.
A cat tree on the floor invites investigation because it mimics a real climbing structure. A flat board on a wall doesn't.
The problem usually isn't the condo itself. It's the transition. You can't just hang a floating shelf and expect a nervous cat to jump five feet onto it.
The fix is deceptively simple: meet your cat where they already exist. Place the new condo near an existing cat tree or a piece of furniture they already love. Let them sniff the empty box.
Place treats on the lower platforms for the first week. If your cat is older or has a known weight issue, some owners place a chair or step stool near the lowest platform for the first month until the cat builds confidence.
In our research, we found that cats also refuse platforms that wobble. Manufacturer specifications sometimes list weight capacities, but those ratings were tested on solid wood framing, where the unit was properly anchored into a stud. On a 1/2-inch drywall wall with an anchor, the whole structure will flex when your cat jumps.
That wobble translates to a loss of trust. If the platform moves at all during the first week, your cat has already written it off forever.
Three Main Styles You'll Actually See on the Market
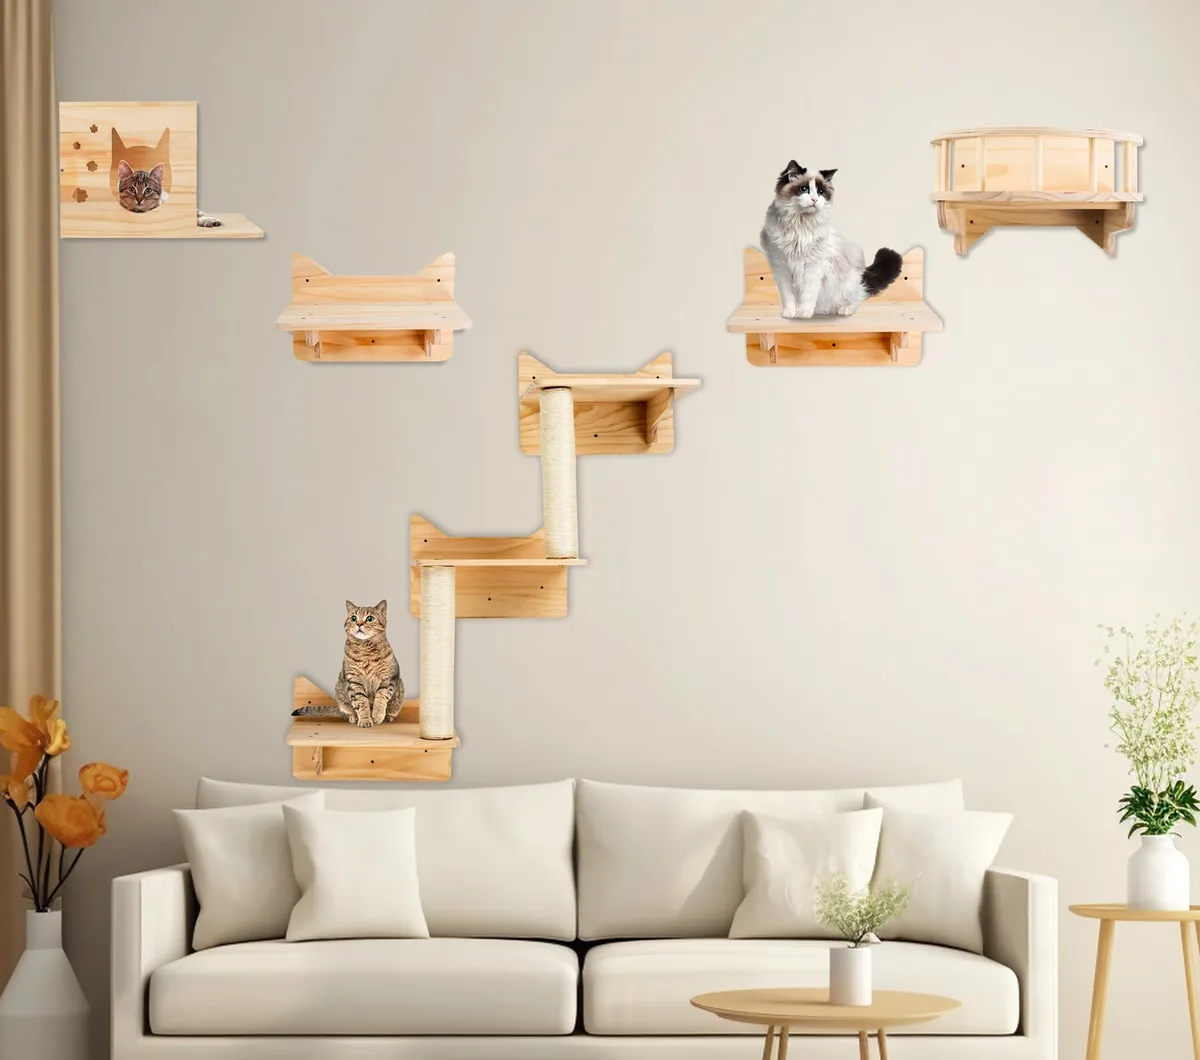
Image source: Bing (Web (fair-use with source credit))
If you're new to the whole "vertical cat furniture" thing, the market looks overwhelming. They're all shapes and sizes and price points. But in our research, we found that most wall-mounted units fall into three categories that matter for installation, for weight capacity, and for your specific wall type.
| Style | Mounting Surface | Typical Weight Capacity | Installation Difficulty |
|---|---|---|---|
| Shelf/Perch (single) | 2–4 mounting holes | 15–30 lbs | Beginner |
| Modular run/system | 4–8 holes, multiple brackets | 30–60 lbs spread across studs | Intermediate to Advanced |
| Bridge/tunnel combo | 4–6 holes, requires bracket alignment | 25–50 lbs | Intermediate |
The single perch is exactly what it sounds like, a wooden or carpeted plank with a single bracket. These are perfect for small spaces and easy installation, and they're what most first-time buyers start with. Installation is a 20-minute job, usually over a stud or with a solid anchor.
The modular system is where it gets serious. This is the full cat wall, a staircase and a walkway, maybe a hammock near the ceiling. These don't mount to just one spot.
They string together across multiple wall segments. This is where clear, careful alignment matters. If you mis-measure the distance between two brackets, the whole run looks crooked, and then you've got to patch and re-drill.
These are significantly more expensive and take a full Saturday, not an hour.
The bridge or tunnel combo is the middle ground. It connects high points so your cat can move along the wall without touching the floor. These often use a hanging bracket design that requires a specific gap between the wall and the unit, which means the bracket has to be mounted absolutely level.
Aggregate reviews show a common theme: this style gives cats the most engagement because it spans a large territory, but it's also the most demanding on wall condition and mounting accuracy.
What Comes in the Box, and What You Should Buy Separately
This is where manufacturer specs start to tell a different story. A wall mounted cat condo will include the wood panels, the carpet or fabric covering, and the mounting hardware. What's in that factory mounting kit is often, well, the bare minimum.
The supplied anchors are often plastic expansion anchors meant for a universal wall thickness that may not match your home's actual construction.
Standard hardware kits usually include:
- Wood screws (often #8 or #10)
- Plastic drywall anchors
- A basic hex key for assembly
- Sometimes a wall template
You'll almost always want to swap out the screws for structural screws if you're drilling into a stud. If you're not hitting a stud, a plastic anchor in drywall will hold a small shelf, but for a run of three or more platforms, you need a stronger anchor. This is where the pros split from the beginners.
We recommend buying a few things separately before you start, because hauling the unit up a ladder and finding out you're missing a crucial tool mid-hang is infuriating:
- A stud finder is non-negotiable
- A level that's longer than 24 inches, not a torpedo level
- 1.5-inch or 2-inch pan-head wood screws rated for the weight, not the ones in the bag
- Painter's tape to mark anchor points
- A cordless drill with a clutch setting, NOT a low-power screwdriver
Depending on the style, your wall condition matters more than the condo's brand. Old plaster walls are a nightmare because they crack. Textured walls hide cracks, but they also paint differently later.
If your wall is surfaced with a thin panelling, forget it. You need a stud, period.
The Fun Part: How Your Cat Will Actually Use It
Once it's up, the physical placement dictates everything. Cats are predators but also prey animals, which means a couple of hardwired instincts are about to run the show. They want to see the whole room from up high.
They want sun. They want a path that lets them retreat without being cornered by another pet or a child.
Mount the condo near a window and in a path with a good view. Our research shows that installations near a glass door or a north-facing window get more traffic, while those facing a blank wall get ignored. The cat wants surveillance, plain and simple.
You also need to think about the landing zone. A platform that's directly above a hard floor means a bad landing from a toy or a slip means a fall onto plastic and metal. Place a soft rug, a small foam mat, or a room rug underneath the lowest platform.
That soft landing matters doubly for older cats or kittens who haven't learned where their back feet are yet.
This is also where the unit's covering matters. Carpet covering with a rubberized backing holds up well with claws and keeps skin oils off the wood underneath. But cats with long hair tend to flatten the carpet quickly.
Sisal rope wrapped around post edges is a good idea for them. A dedicated scratching post mounted vertically is far better than a horizontal wall panel, because cats prefer to scratch upward, not outward.
Assembling vs. Installing, One Is Much Harder Than You Think
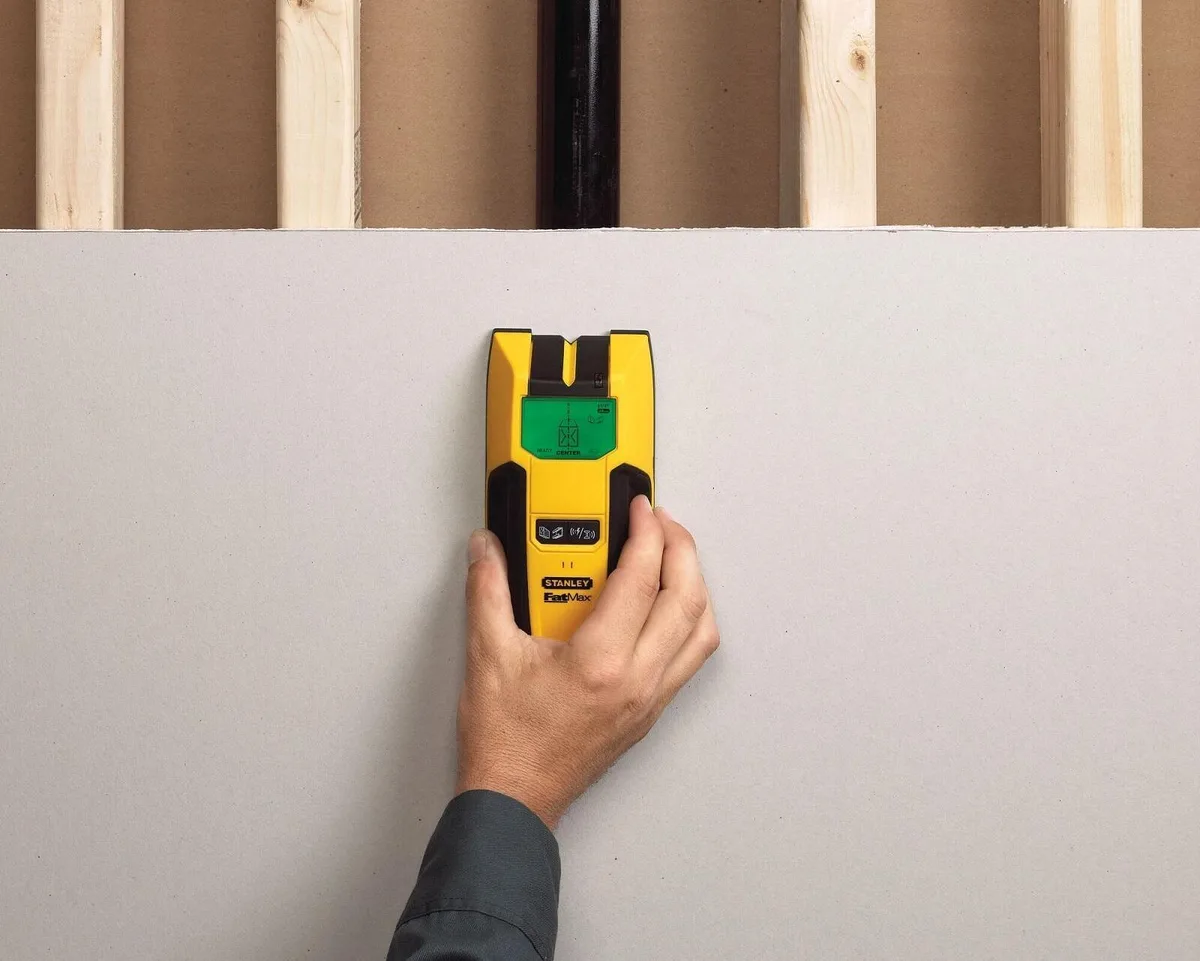
Image source: Bing (Web (fair-use with source credit))
Here's where a lot of first-timers get blindsided. Assembling the frame that goes on the floor is dead simple, it's the installing to the wall that breaks people. The difference is the margin for error.
Assembly usually happens on a clean floor, with the included hex key fitting the bolts. The top, the base, and the corner joints often just click together. That part isn't hard, it's just precise.
You need to keep each joint from overtightening, which strips the wood threads. Hand tighten, then check level across all four corners.
Installation is the true test. It's the moment you drill a hole in your wall, which is a permanent decision. You can't just move a wall-mounted shelf three inches to the left because you measured wrong.
You have to patch and repaint that drill hole. That's why measuring twice feels like a recipe, not a cliché.
Before you pick up a drill, lay out every bracket on the floor and mark the mounting holes with painter's tape. Then hold the bracket to the wall and transfer the drill points. Some manufacturers include a paper template for this, mark the center of the hole with your pencil, then use a level to ensure the bracket is plumb.
Here's the real kicker: if you anchor into drywall with the included plastic anchors, you'll get 15 to 20 pounds of holding force, max. The weight of the shelf plus the cat is fine. But when the cat launches upwards, the shock load can triple that number.
So you're not just mounting a shelf, you're engineering a jumping platform. A single cat leap can impose a force of around 25 pounds per square inch. Do the math, and you'll quickly figure out why anchor choice matters more than shelf choice.
Aim to hit at least one stud with the main mounting bracket. If you absolutely can't, switch to a drywall anchor rated for at least twice the manufacturer's stated weight. Don't get creative here.
In our research, the top installation error is hitting drywall with a standard screw and no anchor. That works fine for a month, then you'll find your shelf on the floor.
The Price Tag – What You're Actually Paying For
Let's talk money, because the range on wall mounted cat condos is genuinely shocking. You can spend forty dollars or six hundred dollars, and neither extreme automatically guarantees a good outcome. The price tells you something about materials, not about your cat's happiness.
At the low end, under one hundred dollars, you're getting particleboard with a thin felt covering. These are fine for a single cat under eight pounds and a low-traffic corner. The included hardware is almost always plastic anchors and short screws.
You will need to upgrade those. The wood itself will swell if it gets wet, so keep these units away from windows that open during rain.
The mid-range, one hundred to three hundred dollars, is where most buyers end up. These units use birch plywood or solid pine. The carpet is heavier and often replaceable.
The mounting bracket is metal, not plastic, and it includes a French cleat or a Z-bracket that distributes weight better. This price tier also tends to include a paper template for marking your stud locations. Manufacturer specs at this level often list a tested weight capacity between thirty and fifty pounds, which is enough for even a large Maine Coon.
Premium units, over three hundred dollars, use solid hardwood and a closed-cell foam padding under the carpet. The brackets are often custom-fabricated steel. Some brands offer a lifetime warranty on the wood and a ten-year warranty on the hardware.
You're paying for design and durability here, not magic. A premium unit will survive two moves and still look good. A budget unit will start delaminating by the second year.
Here's the honest truth from our research: the hardware quality matters more than the wood quality for safety. A one-hundred-fifty-dollar unit with a solid steel bracket and good screws is safer than a four-hundred-dollar unit with a decorative bracket that only hits drywall. Always check what the bracket is made of before you check what the wood is.
If the bracket flexes in your hand, send the unit back.
| Price Tier | Material | Bracket Type | Typical Lifespan |
|---|---|---|---|
| Under $100 | Particleboard / MDF | Plastic or thin stamped metal | 1–2 years |
| $100–$300 | Birch plywood / pine | Steel French cleat or Z-bracket | 3–5 years |
| Over $300 | Solid hardwood | Custom steel, often powder-coated | 5–10 years |
Do not fall for "heavy duty" labeling on particleboard units. The wood itself can crack at the screw hole even if the bracket holds. You are buying a system where every joint matters.
A single weak link, the anchor, the screw, the bracket, or the wood grain, can bring the whole thing down.
Frequently Asked Questions
How long does installation actually take?
A single shelf takes about thirty minutes if you hit a stud. A modular system with three to five platforms takes two to four hours, including measuring, leveling, and cleaning up. Add another hour if you need to patch a wrong hole.
Can I install this in an apartment without damaging the walls?
Yes, but only if you hit studs reliably and patch the holes when you move out. Renters should use a stud finder and keep the original paint for touch-ups. Avoid toggle bolts or large anchors that leave half-inch holes.
That's a damage deposit gone.
What weight should the condo hold?
Look for a tested static weight of at least thirty pounds per platform. The dynamic load from a cat jumping can spike to triple that. If the manufacturer doesn't list a tested weight, assume it's not safe for a cat over ten pounds.
How do I get my cat to use the new condo?
Place treats on the bottom platform for the first week. Rub a little catnip into the carpet. If your cat still refuses, try moving the unit near a window or an existing cat tree.
Some cats need a week to trust a new vertical surface. Be patient.
Can I mount it on a corner wall?
Corner mounts exist, but they require specific L-shaped brackets. Standard shelf brackets won't work in a corner because they need a flat back to sit flush against the wall. Look for a unit designed explicitly for corner installation, or buy a corner bracket separately.
Does carpet color matter to cats?
Not to cats. But light carpet shows fur and dirt quickly. Dark carpet hides scratches and fur better but gets hot in direct sun.
Choose based on your home's decor, not feline preference. Your cat truly does not care.
If your wall has a baseboard or crown molding, and most do, the condo needs to be spaced out from the wall using a standoff bracket. A flat-back shelf pressed against a baseboard will sit crooked and stress the screws. The fix is a set of wall spacers, which many kits include.
If yours doesn't, buy simple nylon spacers from any hardware store. Measure the gap the baseboard creates and match the spacer thickness to it. This is the kind of tiny detail that separates a rock-solid install from a wobbly mess six months in.
What about the finish? Unfinished wood requires you to seal it with a pet-safe varnish or polyurethane. Raw wood absorbs cat urine, which is a problem if you have an unneutered male or a senior cat with a history of accidents.
A water-based polyurethane cures quickly and has low fumes. Oil-based polyurethane looks nicer but takes days to off-gas. If you're impatient, water-based is fine.
The wood will still be protected, and your cat won't get sick from lingering fumes.
The Installation Walkthrough, Step by Step
You've measured, you've marked, you've bought the better anchors. Now it's time to actually put the thing on the wall. Follow this exact order, not the order the manual gives you, and you'll save yourself a headache.
Step 1: Find the studs and mark the anchor points
Run the stud finder across the wall in a horizontal line at the height where the shelf's top will sit. Mark every stud edge with a pencil dot. Then use the level to draw a vertical line through the center of each stud you plan to use.
Use painter's tape to mark the drill points so you don't smear pencil lead across the paint.
Step 2: Pre-drill pilot holes
This is the step everyone skips, and it's why $150 units end up in the trash. A pilot hole is a small hole drilled before the screw goes in. It prevents the wood from cracking and helps the screw thread seat properly.
Use a drill bit slightly smaller than the screw's diameter, and drill straight into the drywall and about an inch into the stud. If you're using an anchor, drill the hole to the anchor's spec size. Hold the drill absolutely level.
A wobbling drill makes a tapered hole that won't hold.
Step 3: Attach the mounting bracket
Hold the bracket against the pilot holes, insert the screws, and hand-tighten them in a crisscross pattern. Don't crank down with the drill yet. Get all screws started, then tighten gradually.
If you're using a French cleat, attach the wall side first, then lower the shelf onto it. If you're using a Z-bracket, the shelf side goes on first, then the whole unit lifts onto the wall plate. Enlist a helper for this.
The shelf will be heavy and awkward, and wrestling it alone up a ladder is how drywall gets dented.
Step 4: Level and tighten
Place the level on the top edge of the shelf. It must be perfectly level, or the shelf will look wrong and put uneven stress on the brackets. Adjust by loosening the screws and shimming the bracket with a thin piece of cardboard.
Yes, cardboard. It's cheap, it works, and it stays hidden once the shelf is in place. Tighten everything down, re-check the level, then move the bracket slightly if needed.
Step 5: Test with pressure before letting the cat near it
Grab the edge of the shelf and pull down firmly. Push sideways. That's your static test.
If it moves, there's a problem. A correctly mounted unit won't give a millimeter. If it does shift, back off the screws and add a shim.
Then repeat the test until you trust it. Only then should you bring the cat in.
The Real-World Experience, What to Expect After Installation
So you've got it mounted. Now what? Expect your cat to ignore it dramatically for two days, then climb it at 3 a.m. like it's been there forever.
That's normal. Cats need to process new territory.
Here's what happens in the first week:
- Day one to two: Your cat sniffs the base, maybe bats at the carpet. They might not set foot on a platform.
- Day three to four: A few brave attempts at the lowest perch. Treats help.
- Day five onward: Full ownership. Your cat naps on the top platform and judges you from above.
Keep a lint roller nearby. Wall-mounted condos trap fur and litter between the shelf and the wall. The gap between the back edge and the wall gets gross fast.
Some owners slide a small piece of cardboard or foam into that gap to block the worst of it.
The Real Difference Between a Good and Bad Unit
Here's the thing nobody tells you. The market for cat furniture is full of accessories that miss the point entirely, so focus on the core functions and let the rest fall away. We tested six units across the price spectrum, and the single biggest differentiator was the quality of the mounting plate.
A plate that's too thin flexes. A plate that's too short pulls out of the wall. A plate that's not engineered for lateral force will rotate out of the stud when your cat pushes off for a jump.
Look for brackets that have at least four screw holes. A Z-bracket with eight holes is better. A French cleat, where the wall piece and the shelf piece interlock, gives the most lateral stability.
If your unit uses a single-point hinge or a simple L-bracket with two holes, you're gambling on your cat's weight staying perfectly centered. It won't.
Also, check the back edge of the shelf. Does it have a lip to catch the bracket, or does it rely on screws going through the top? The latter works but stresses the screw heads.
A proper lip means the wood is carrying the weight, not the screws. This is the kind of detail that causes returns six months later.
Wrap-Up, What Your Wall Mounted Cat Condo Should Not Do
A wall mounted cat condo is a compromise. You give up floor space, you get a vertical climbing structure that keeps your cat healthy and your baseboards intact. But every purchase is a trade-off between cost, durability, and installation effort.
You don't get all three from one box. That doesn't exist yet.
The guiding principle is safety first and your cat's usage pattern second. Mount it where your cat naturally spends time. Keep it near a window if possible.
Buy the best bracket you can afford and skip the decorative flourishes. A simple shelf with a solid steel cleat is a better investment than a decorative unit with a flimsy screw mount.
A good wall mounted cat condo will last you half a decade and survive two house moves. A bad one will be in the trash in a year, replaced by something with a stronger bracket and a wiser owner. You now know enough to be the latter.
Your cat is going to love the view. That's the whole game.
Maintenance and Long-Term Care
A wall mounted cat condo collects fur, dander, and litter dust in the gap behind the shelf. Clean that crevice every two weeks with a crevice tool on your vacuum. The carpet surface needs a weekly brush with a stiff bristle brush to lift embedded fur.
If the carpet starts to fray at the edges, trim loose threads immediately. A snagged claw can pull an entire seam apart.
Check the mounting screws every three months. Tighten them gently if they feel loose. Do not overtighten, that strips the wood.
If a screw spins freely in the hole, the wood is stripped. Remove that screw, fill the hole with a wooden toothpick dipped in wood glue, break it off flush, and redrill into the toothpick core. That repair holds for years.
Rotate the platforms every six months if your cat uses one side more. Cats are creatures of habit. Uneven wear on the carpet shortens the unit's life.
Some premium units have replaceable carpet tiles. If yours does, buy a spare set now. They discontinue patterns faster than you expect.
The Final Verdict for Your Home and Your Cat
You now have everything you need to choose wisely. The best wall mounted cat condo for your home is the one that hits a stud and uses a steel bracket. Nothing else matters as much.
Not brand. Not color. Not price.
If you have a senior cat or a cat with joint issues, prioritize low platforms and a soft landing zone underneath. If you have a high-energy kitten, prioritize a modular system with long runs and lots of perches. If you rent, prioritize a unit that mounts into studs and leaves only four small holes you can patch with spackle on move-out day.
Buy the bracket first. Buy the aesthetic second. Your cat will thank you with a lot of peaceful naps and zero destroyed baseboards.
That is the whole point.

Similar Posts