Are you tired of your cat turning your favorite couch into a scratching post? You’re not alone, and there’s a simple solution that doesn’t involve declawing.
Nail caps for cats offer a humane way to protect your furniture and your feline friend. But how do you get those little caps onto your kitty’s claws without a struggle? It might seem tricky, but with the right approach, you can have those caps on in no time.
Imagine the peace of mind you’ll feel knowing your home is safe from scratches, and your cat is comfortable. Keep reading to discover the step-by-step process to make both you and your cat happier.
Benefits Of Nail Caps For Cats
Cats bring joy to many homes with their playful nature. But their sharp claws can cause issues. Scratched furniture and accidental scratches are common concerns. Nail caps offer a simple solution. They provide several benefits for both cats and their owners.
Improved Furniture Protection
Nail caps help protect your furniture. Cats love to scratch, which can damage sofas and chairs. Applying nail caps reduces this risk. They cover the sharp tips of the claws. This helps keep your home looking neat.
Reduced Risk Of Injury
Cats can accidentally scratch their owners. This is especially true during playtime. Nail caps make these scratches less severe. They soften the impact of a cat’s playful swipe. This is great for families with young children.
Enhanced Cat Comfort
Cats may suffer from split or broken nails. Nail caps can prevent this. They shield the nails from damage. Many cats adjust quickly to wearing them. This can lead to happier and healthier paws.
Temporary Solution For Problematic Behavior
Some cats scratch excessively. Nail caps provide a temporary solution. They allow time to train your cat. Teach them to use scratching posts instead. This can improve your cat’s behavior over time.
Easy Application Process
Nail caps are easy to apply. Many pet owners do it at home. This makes them a convenient choice. They are available in many sizes and colors. Choose ones that suit your cat best.
Credit: purrdypaws.com
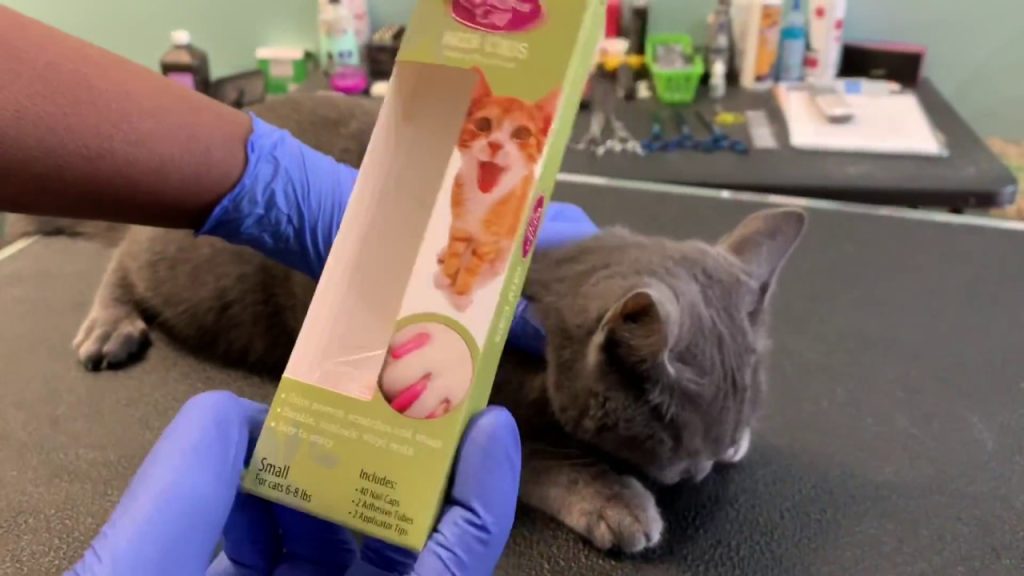
Choosing The Right Nail Caps
Choosing the right nail caps for your cat is crucial. It ensures comfort and effectiveness. Nail caps prevent unwanted scratching while keeping your cat safe. Consider factors like size, material, and color. These influence how well the caps will work for your feline friend.
Size And Fit
Choosing the correct size is essential. Too small, and they won’t fit. Too large, and they may fall off. Measure your cat’s nails before buying. Many brands offer size guides. Use these to find the best fit. A snug fit ensures the caps stay on longer. Your cat will adjust faster, too.
Material Options
Nail caps come in various materials. Some are soft and flexible. Others are more rigid. Soft caps are more comfortable. They are ideal for sensitive cats. Rigid caps can last longer. They may be better for active cats. Check the material before purchasing. Ensure it suits your cat’s needs.
Color Choices
Nail caps come in many colors. Choose a color that suits your cat. Bright colors are fun and easy to see. They make checking the caps simple. You can also choose neutral tones. They blend in with your cat’s natural look. The choice is yours. Pick what you prefer.
Preparing Your Cat
Preparing your cat for nail caps is essential. Cats can be sensitive to new experiences. A calm and relaxed cat will make the process easier. Setting the stage for a positive experience is key. Let’s explore some steps to prepare your cat.
Calming Techniques
Start by creating a peaceful environment. Soft music can soothe your cat. Speak in a gentle voice to reassure them. Some cats enjoy gentle petting or brushing. This can relax their nerves. Offer treats to create a positive association. A calm cat is more likely to cooperate.
Gathering Supplies
Have all your supplies ready. You need nail caps, adhesive, and a nail clipper. Choose the right size of caps for your cat’s paws. Lay everything out in a convenient spot. This helps streamline the process. Being prepared reduces stress for both you and your cat.
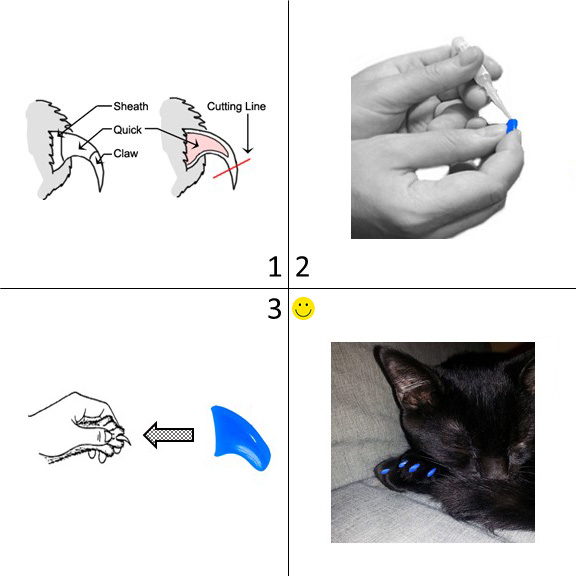
Trimming Nails
Trim your cat’s nails before applying caps. This ensures the caps fit well. Use a cat-friendly nail clipper. Avoid cutting too close to the quick. The quick is sensitive and can bleed. Trim just the sharp tips. This makes applying nail caps easier. A well-trimmed nail provides a good surface for the cap.
Credit: www.youtube.com
Applying Nail Caps
Applying nail caps to your cat can be a straightforward process. They help protect your furniture and reduce the risk of scratches. With a little patience, you can do it at home.
Cleaning The Claws
Before applying nail caps, clean your cat’s claws. Check for any dirt or debris. Use a soft cloth to gently clean each claw. This ensures the adhesive will stick properly.
Adhesive Application
Next, prepare the adhesive. Most nail cap kits include a tube of glue. Squeeze a small amount into the cap. Avoid overfilling as it can cause mess.
Securing The Caps
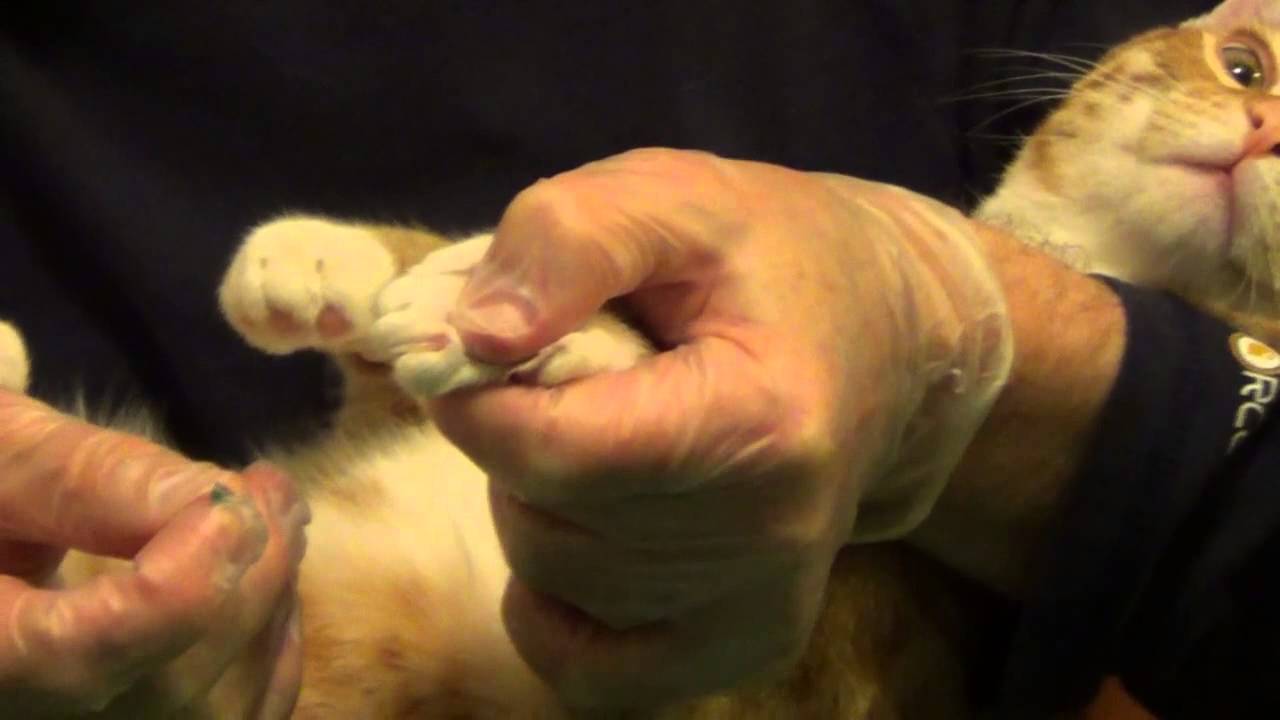
Now, it’s time to secure the caps. Gently slide a cap onto a claw. Ensure it fits snugly without pinching. Hold it in place for a few seconds. This allows the adhesive to set. Repeat for each claw. Monitor your cat’s reaction. Ensure they feel comfortable.
Post-application Care
Once you’ve successfully applied nail caps on your cat, the journey doesn’t end there. Proper post-application care ensures your furry friend stays comfortable and the nail caps serve their purpose effectively. This section covers essential steps for monitoring your cat’s well-being and maintaining the nail caps over time.
Monitoring For Discomfort
Watch your cat for any signs of discomfort. Check if they are biting or licking the caps excessively. This may indicate irritation. Ensure the caps are not too tight. If they seem distressed, remove the caps immediately. Comfort is key.
Replacing Lost Caps
Occasionally, a nail cap may fall off. This is normal. Keep spare caps handy to replace lost ones quickly. Check your cat’s paws regularly. Missing caps can cause uneven wear. Prompt replacement keeps all nails covered.
Regular Maintenance
Regular maintenance is crucial for nail cap effectiveness. Inspect the caps weekly for wear and tear. Trim your cat’s nails slightly if they grow beyond the caps. Replace all caps every 4-6 weeks to ensure they fit well and function properly.
Credit: www.reddit.com
Tips For Success
Gently trim your cat’s nails before applying nail caps. Use a firm, yet gentle grip to hold the paw. Slide the cap over the nail, ensuring it fits snugly.
Putting nail caps on your cat can be a game-changer for protecting your furniture and your skin. However, getting it right requires a bit of finesse. Here are some tips for success to ensure both you and your feline friend have a smooth experience.Training Your Cat
Start by familiarizing your cat with the nail caps. Let them sniff and play with them before attempting to put them on. Practice handling your cat’s paws gently, offering treats to create positive associations. Patience is key. Gradually increase the time you spend holding their paws. Try placing the caps on one paw at a time to let your cat adjust slowly. Have you ever tried doing this while your cat is sleepy? It might just be your secret weapon.Avoiding Common Mistakes
One common mistake is choosing the wrong size of nail caps. Ensure you measure your cat’s nails accurately for a snug fit. Loose caps can fall off, while tight ones might cause discomfort. It’s easy to rush the process, but this can lead to stress for your cat. Take breaks if your cat seems agitated. A calm cat is more cooperative, making the experience pleasant for both of you.When To Seek Professional Help
If you’ve tried and still struggle to apply the nail caps, consider seeking help. A professional groomer or veterinarian can guide you through the process. They can demonstrate the technique in-person, helping you learn hands-on. Also, if your cat shows signs of distress or unusual behavior post-application, consult a vet. It might indicate an underlying issue that needs attention. Have you ever wondered why some cats take to nail caps effortlessly while others resist? Every cat is unique, and what works for one might not work for another. Tailoring the approach to your cat’s personality can be the key to success.Frequently Asked Questions
How Do I Put Nail Caps On My Cat?
Trim your cat’s nails first. Apply adhesive inside the nail cap. Gently slide the cap onto the nail. Ensure a snug fit, but avoid applying too much pressure. Monitor your cat for comfort and adjust if needed.
How To Get Nail Caps Off Cats At Home?
Gently trim the tips of the nail caps with a nail clipper. Soak your cat’s paws in warm, soapy water. Carefully peel off the softened caps. Ensure comfort and safety throughout the process. If needed, consult your veterinarian for assistance.
Do Cats Tolerate Nail Caps?
Cats can tolerate nail caps with proper introduction and adjustment. Ensure comfort by choosing the right size and applying correctly. Monitor your cat’s behavior for any signs of discomfort. Most cats adapt well, but individual tolerance may vary. Always prioritize your cat’s wellbeing when using nail caps.
What Kind Of Nail Glue For Cat Caps?
Use a non-toxic, pet-safe nail glue specifically designed for cat nail caps. It ensures a secure fit without harming your cat. Ensure the glue dries quickly and is gentle on their nails. Always check product labels for safety and suitability for cats.
Conclusion
Nail caps can help protect your furniture. They also prevent scratches on your skin. Applying them is simple with a bit of patience. Start by gently handling your cat’s paws. Trim the nails carefully. Choose the right size of nail caps.
Use adhesive for secure attachment. Always give your cat treats and praise. This builds a positive association. Regularly check the caps for wear. Replace them every 4-6 weeks. With practice, this process becomes easier. Your home and your cat will both be happier.